8.0.0.4 Enhances Communication
Happy Summer! We’re at the peak of the year already, how did that happen?? We hope everyone is having a good summer, and especially for those of you in Education we hope the “down time” is productive! We’re still doing what we always do here at Sassafras, and we have a couple new features I think many of you will be excited about. As a couple of you noticed the other week (and ironic to the tagline of this release), the blog post got away from us a bit early. Sorry to be a tease. But now there is much more to talk about, so let’s get to it!
View Own Assets
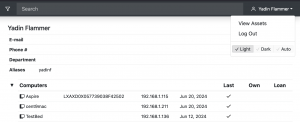
Our User Assets Extra has been extremely popular for admins, but we’re often asked if users can view their own asset list. We’re pleased to announce that now they can! This relies on users logging in of course, which in our platform parlance is part of Admin Authentication. Keep in mind, “admin” can be anything from Administrator to Guest. It will also require the use of a new Privilege in the Role the authenticated user holds. As always with permissions related things, we’re here to help! But basically you make a new Role that has this privilege and use that for “other authenticated users” with a mechanism like Azure. Then when a user clicks their name in the corner of the Web UI, they have an option to View Assets. The person will see anything where the User matches their “Account” name. As always, sites that have multiple login methods, or platforms where login names are not consistent between each other, must consider how to manage this. And again, we are here to help!
Deny Policy Messages
Yep! You can now define a custom message on a Deny Policy. Previously all deny messages were defined at the Program level. But let’s face it, that was cumbersome for large suites or things with prolific versioning *cough* browsers *cough*. Custom “on grant” messaging in policies has been around forever, but deny was not as accessible. With this addition you can easier inform a user that “this is not authorized software” or “you need to come see IT for an update” or “stop playing games at work”.
 Remember that while there is not yet a Policies window in the Web UI, you can still manage existing policies there. Need to make a policy? Just click the green dot on the Manage page to make an Observe policy for the Product. Then you can edit that Policy (link from the Product, or Search from the Dashboard) and make it a Manage or Deny. Of course you can always use KeyConfigure for Policy management, but if you’re feeling lazy about launching that app there are ways to stay in the web.
Comments in History
A very recent request, and a very flexible one as well! For a while now we have been recording all this great information in the History of Computers and Devices. This allows for looking back over an asset’s lifecycle for changes in department, assigned owner, hardware changes, etc. But what if you wanted to add some commentary to WHY that change occurred? What about some other random note that wasn’t logged in some other way? Yes there is the Notes pane, but that’s not great for keeping a log correlated to other changes. With this release you’ll find on the History pane there is an Add Memo button. Simply, it adds a “memo” entry with whatever note you want. As with other History items the date and person are logged, and you can search for “memo” to specifically see all these items.

We have some great integrations with ITSM solutions like TeamDynamix. But if you lack service ticketing you can even use this to log the history of random service on an asset. If you use the Alerts feature of the platform to require commit notes when editing objects (computers, polices, purchases), then on that prompt you’ll also see an option now to record to History. This allows forced logging of why a change was made, and easy recording of it to History for easy reference later.
Can’t stop the Signal
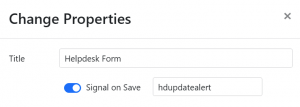
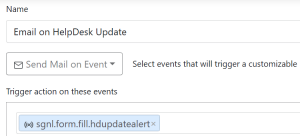
The addition of Actions has also proven very popular. One request has been to make their triggering even more specific in ways that a Filter can’t achieve. This has led to the addition of Signals. These are specifically used in Forms, and are enabled as an option with an optional Signal Name. Actions can then trigger on a Form Signal. Say all that in plain English? Ok so imagine you only want to get an email when someone updates a computer using a certain Form view, not when a computer is updated in general or by using another form view or by the client, and regardless of what attribute(s) on that form are changed. This can then be triggered globally on any signal, or only when a specific named signal is triggered. The Action Trigger is in the form of sgnl.form.fill.signalname and must be manually typed at this time (not in the drop down). Note if you trigger just on sgnl.form.fill the Action will run on ANY form completion where Signal is enabled. Otherwise, it will only trigger when a Form with the Signal of signalname is saved.
Dependent Field Values
Ok pretty simple concept here right? When I pick a certain Department or Location from the preset list of values, I want a different set of Building preset options to show up. No computer would be assigned to the Spanner building if it was in the Math department, so get that out of my list. Your wish is granted! You can specify these dependent values manually (Web UI -> Settings -> Columns), or get things all set up in a spreadsheet, save as CSV, and just drag that into the Settings where indicated. The idea is pretty simple, but does get a bit thick to look at and maintain if you get too carried away, so be prudent. For example:
In Region put Northeast
In Location put [region:Northeast] Main Campus
In Building put [region:Northeast] [location:Main Campus] Spanner
In this setup, Main Campus only shows in the Location field if the Region is Northeast. Spanner only shows in Building if the Location is Main Campus.
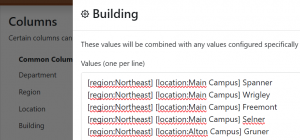
In a CSV it would look like this for import:
region,location,building
Northeast,MainCampus,Spanner
The dependent entries in all fields are created automatically for you when that is imported (e.g. the Region, Location, and Building entries in the above example). If you leave a column blank in the CSV then the thing in column 3 is dependent on column 1 not 2, so you can import a complex configuration pretty easy. These dependencies can run in any direction, so one Building could have Locations inside it dependent on that choice, while other Buildings only show up if a certain geographic Location is selected. This allows for some custom use of the fields between areas if needed. However, because the CSV import is column order dependent, you’d need multiple CSV imports if you were doing bi-directional dependencies. Be careful, you can make a small mess if you’re not watching all the relationships 😉
HP Warranty Lookup
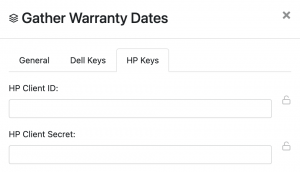
Some of you will know we’ve all been waiting… oh I don’t know, about 10 years for this? HP has finally completed an API that allows for warranty query! So, this has been added into the Gather Warranty Dates script along with the Dell and Lenovo functionality. To fully support this, a new field has also been added to Computer records – System SKU. This is gathered by the KeyAccess client from the registry of any Windows computer, and may exist on non HP systems. It is used in the warranty lookup in some cases, but in general may also be useful from an inventory standpoint.
Property Widget Enhancements
Several items on this point. There is now a widget for Other Device Property. Turns out putting lots of other random stuff into AllSight has become quite popular! We’re thrilled with that, but it meant wanting to visualize that data like everything else. To make this really useful since everything is “other”, we needed to add a configuration item for the Device Type so it could be narrowed down more. What’s good for one thing is good for another, so this has also been added to all the other Device Property widgets. This means you can have much more granular visualization of a Type of devices in a Category, and whatever property is of interest for them. Warning: if you set the Property to Type and then specify a Type, you’re not gonna be looking at much.

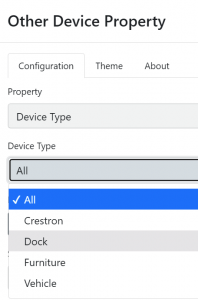
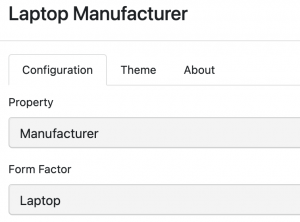
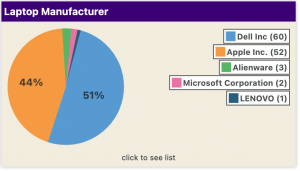
On a similar note, the Computer Property widget (still probably my favorite widget) now has a selector for Form Factor. This will let you do things like just show a bar chart of RAM on Desktops or Laptops and so forth. As with the Device widget, setting the Property to Form Factor AND selecting one form factor means you just get a 100% pie. But if you’re trying to see just the OS break down on portables, that’s now possible at a glance.
Other Items
- Computer Rules are now in the Web UI! For real now, not just the Filter part of them. 😉 As with KeyConfigure they show at the top of the Filter list.
- Forms now have an option to make a field Required for input.
- When clicking the Search bar on a Floorplan, you’ll now see a list of all available Software in that location to pick from.
- Local IP added to Computer information. This does a best effort to pull the IP the computer is using to communicate with the server. This differs from the Last Address we have long had which is the IP we see the connection coming from. The latter can be masked by a NAT where the former is not. However, what the OS tells us when the system has a lot of interfaces may not be what you’d want it to tell us. We can only do our best. 😉
Yes this is a MINOR release despite all the goodies! As always, you can see a complete list of all changes and fixes in our Release History. If you read about something here and are totally confused, reach out to us! We are happy to clarify features and help you catch up on new functionality.
Enjoy the new toys, and see you next update!
Author: Yadin Flammer
Site Search
Documentation Search
Categories
Social
Subscribe
| Thank you for Signing Up |


