Announcing AllSight 8!

You may have noticed it’s been a while since our last release. That’s because it’s time for a new Major version. In fact, a Major major version. Announcing: AllSight 8!
Our focus for some time has been moving more development into the Web UI, and this release is a prime example of that. The entire new major feature of this release – Hardware Refresh – is entirely driven in the Web UI. Additionally, a number of significant enhancements and performance increases have been introduced.
Note you will need a new license file to update to this version, and the server update will do a full backup. Otherwise, it’s just another one of our easy to apply updates. So let’s get into the features!
Hardware Refresh
A number of customers over the last couple years have asked about more detailed management of hardware refresh. We then conducted some focused discussions with a few sites about this idea, and what features they would like to see and how it might flow in their organizations. We’re pleased to announce this new component of AllSight and hope you all enjoy what it adds to your Hardware Asset Management efforts.
There are two main components to this feature set. The first is the new Models page which is found under Settings. Think of this as a planning version of the features you have on the Computers and Devices pages. You can define replacement models for equipment, like “Summer 24 High End Laptop”, with related information on specifications, reseller, price, and so on. These models can then be linked to computers and devices both to show the original spec they were purchased on, and what spec they are to be replaced by.
The second main component is the Hardware Replacement Extra. This opens to a pivot table style view of all your computers (not devices yet) where you can organize by department or division and show your planning by year or month (or other options). In a grid view you can now see your computer numbers and costs per area per time frame for your financial planning.
Drilling down into a cell you can then review each individual replacement as a line item. These summary lines show basic information about the current and replacement system, and the status of the replacement approval. Action for the system being replaced is also shown, and you have popout links for the computer and user records to access more details as needed.
Clicking the edit button for a given line item then allows for the full replacement planning of that unit. This is a multi step process allowing you to choose replacement equipment, replacement actions, link to the new computer when acquired, copy asset information from old to new records, verify software, and commit the changes. These features are designed to help ensure accurate planning and execution of equipment rollover and avoid details being missed.
Like so many other features of the interface, all of this respects access rights. This means you can delegate privileges in a Role that allows a department head to review their department rollover without seeing other department’s information. You could even allow them to make edits so they can override default replacement choices and confirm their acceptance of the plan before a purchase is made. We very much look forward to hearing what you think of this new feature set, and as always welcome feedback!
Customize Columns
In KeyConfigure you could always choose which data columns you want to see in a window. In the Web, we had a different experience where the columns were fixed and you could choose the “hotlist” of attributes you wanted to see in a drop down for each item. Time and feedback has told us this novel presentation wasn’t as popular as simply choosing the columns to display. With this release that’s what you get. Using the column button in the upper right ribbon now actually sets which columns you want to display. Each column can be resized and used to sort the view. Column choices can be made for Computers, Devices, and Purchases.
Note the Group by is still available as well. This means you can leverage both features in the Web and group by one field and then sort by another column. Effectively this gets you a primary and secondary sort which has never been available before in either UI. Also note that the Search bar functions on ALL displayed columns. As such a search for “art” will show all lines where the computer Name, Last User, Department, etc contain that string in any way if those columns are visible. This now makes the search in the Web more powerful than it ever was in KeyConfigure.
Save Lists
So now that there are all these great tools to set custom displayed columns, apply on-the-fly Filters of criteria, and narrow by Search, you have a resulting list of things. Great, cool, found what you wanted. Now what, take a screenshot? Sure, but now you can also save out that custom list to our standard choice of formats. Just click the upper right drop down in the ribbon and pick your file type. This makes it very easy to get a list of objects based on any criteria and save it in the most convenient format to provide to someone else. Of course you may want to consider setting up a custom account for that person to help themselves to the data as well 😉
Import
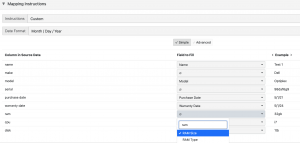
While you’re in that pull down menu, you might notice there is now an Import option. Yep, CSV import is now available in the Web! Like all things in the Web, you might even say it’s easier than it was in KeyConfigure! We do have an Advanced view that is more classic, but the default Simple view is best if you’re just doing 1:1 mapping. If you did need 1:many or many:1 mapping use the Advanced view or keep using KeyConfigure.
Once you drag in your CSV you have a list of all the column headers, and each row has a pull down of all the field choices. Just pick where you want each source item to go. You can also see and flip through a live example of the results. We even auto select any field where the name matches exactly between source and database. There is also a choice for date format. When it all looks good click Import, and get an output of the Results. This is actually an enhancement from KeyConfigure. It allows you to see all partial and full errors to troubleshoot any issues on a line by line basis.
Report Enhancements
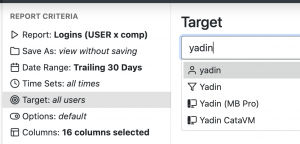
Certain advanced reporting features had remained available only in KeyConfigure until now. While you could Target reports in the web, you could only search for “supported” objects. That is, a usage of comp x prod could only search for those two object types. Now you can also see things like computer Filters, making for many more options and more powerful targeted results.
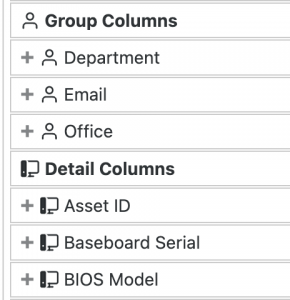
Additionally, the Web only allowed choice of columns from the Report options. Now you can also choose “extended” columns just like in KeyConfigure. That is, on a usage comp x prod report, you could include the make and model of the computers, or the vendor of the product. Remember to use these with care so as to not create confusing results. For example, if you add the Last User for computer, that’s NOT the last user of the software in the report! With great power comes great responsibility not to make a mess 😉
Favorites
The keen eyed may have notice the little star in the upper right next to your name. This is the Favorites menu. By default when you click it there is a drop down of recent objects you have looked at. There are buttons to clear the recents or all favorites. Just about any object in the Web UI should be drag and drop enabled so that you can drag it to the star to add it to your favorites list. Computers, Divisions, Purchases, Devices, Users, Products, etc can all be pulled in from list or detail views in pages.
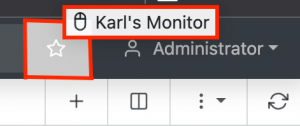
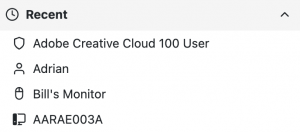
You can also drag FROM the favorites list to any destination field. That is, record details when editing an object, Target field when building a report, etc. The idea is to have an easy to add, clear, and access “hostlist” of items. This could be useful in running reports to not even have to use the friendly and more powerful Search. It could be used to edit a number of records where you are adding links, like Computers to a Purchase.
Other Stuff
- You can now see TPM, Secure Boot, and Encrypted Disk in computer details pages. Previously you could only build an advanced Filter to find the computers matching these properties. Now you can use the visual builder in the Web to target these, and see them in the details of each computer record. These can also be set manually on Imported records.
- The Computer Type widget is now called Computer Form Factor, and a count is displayed for each category.
- Filter out End of Life Products in search from Purchase details.
- Tags are now in the sub navigation sidebar for Computers, Devices, and Purchases
Overall this release has over 100 new features and bug fixes! A number of under the hood performance enhancements and quality of life changes have also been made, and we even put up a blog post with the changelog. We hope you enjoy these new additions and look forward to your feedback.
Author: Yadin Flammer
Site Search
Documentation Search
Categories

Social
Subscribe
| Thank you for Signing Up |


