Printers Window
The Printers Window displays selected records from the Printers Table. The printers table contains a record for every printer added to KeyServer manually (by right click -> New Printer or dragging in a CSV), or by the optional PaperCut integration. In addition to the obvious fields necessary to identify distinct printers, numerous secondary attributes are available for display by using the customizable columns feature.
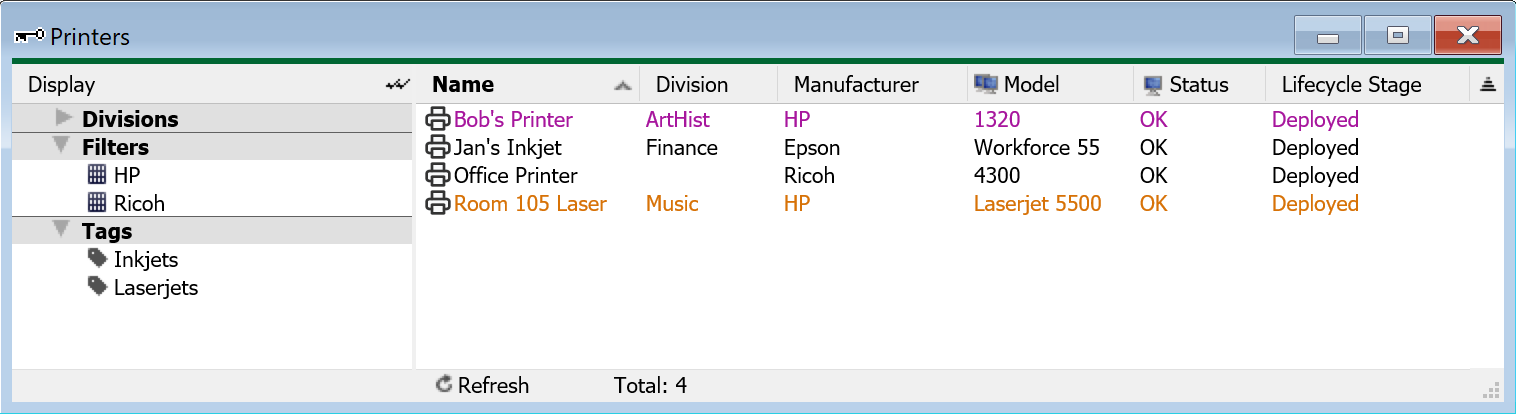
Printer List
The Printers Window is very similar to the Computers window in that it holds a list of assets with various details that can be tagged and added to Divisions. It has fewer features however because unlike computers, printers do not have an active agent or therefore use seats of your KeyServer license. The right hand pane of the Printers Window contains the Printer List. As with all list windows in KeyConfigure you can choose which columns you'd like to display with the most useful info for your situation. Simply right click anywhere in the header row of the printer list and choose Customize Columns. Double click a Printer to get its Details Window and edit the various attributes. To add a printer right click in the empty space and choose New Printer. You can also import by CSV as detailed below.
Display Pane
The left hand Display pane of the Printers Window has a list of Divisions, Filters and Tags in expandable sections. Clicking to the left of any item here will check that item as an applied filter to the displayed Printers. Multiple checks within a category are interpreted as an or, while between categories is an and. In the above screenshot we have created for example filters for different manufacturers, and tags for different device types. With a large fleet of devices, this would allow quick filtering of very specific groups of printers. Double clicking a given item will open a new window that contains only the printers that match that one grouping.
It is important to note that while Printers have their own list of Tags and Filters, Divisions are shared with and controlled by the Computers Window. The Divisions are shown in the Printers window so you can easily drag and drop printers into them, and you can use them to filter the printer list, and double click them to show a new window with only the member printers. However, you can not make new Divisions or edit divisions in the Printers window, those operations must be performed in the Computers window.
As with other windows, you can create tags by adding them to an individual device. Once created, you can drag other printers into that tag. We also have Optional scripts on our website for managing tags that you may find useful.
Importing
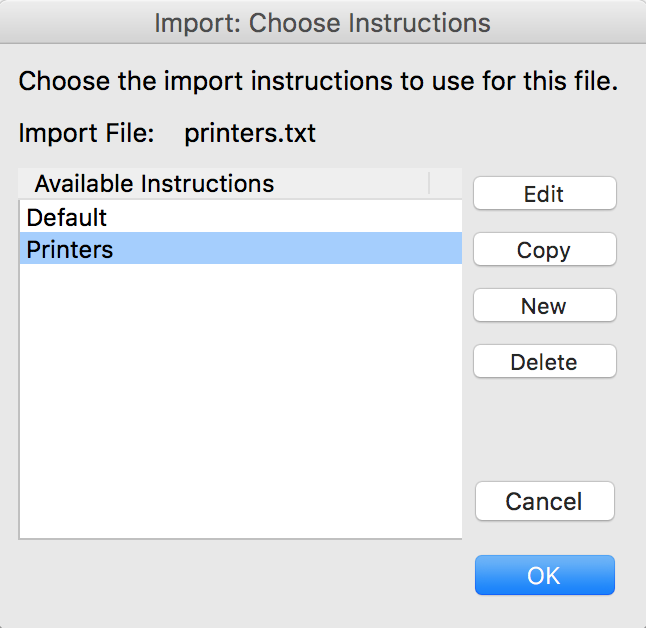
Much like the Computers window, you can import Printers into KeyConfigure by simply dragging in a CSV file. The data you need to import depends on how you'll be using Printers. Specifically, the Service Type is important for using IPP, as it is automatically set to PaperCut if you use that service and pull all printers from that system. At the most basic, you want a CSV that would have Name, IP, and Service, and then you can have other fields as desired and as detailed in Tables.
name,ip,service
testprinter,192.168.1.80,IPP
When you drag this file into the Printers window it will pop up the Import Instructions dialogue.
Click New to make a new import set. You'll then have another window where you can Name the set for later use, and drag your Source fields under the appropriate Columns. Once you have things lined up as needed, save the set.
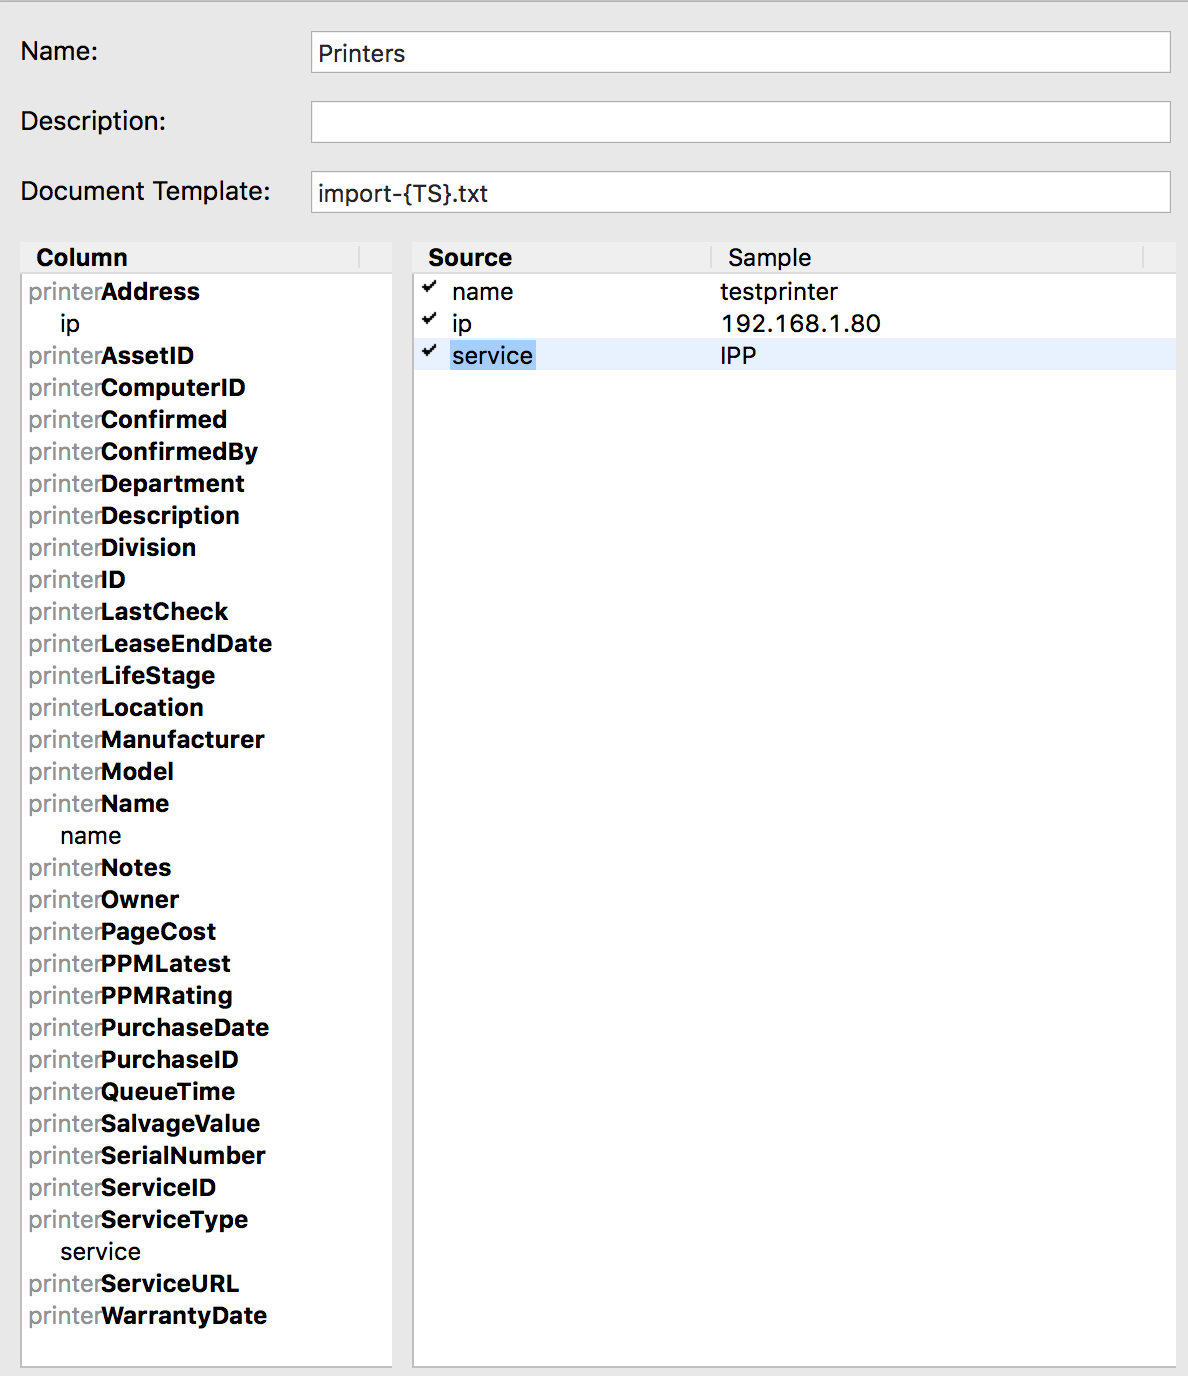
You'll be returned to the import instructions window. Make sure your new set is selected and click OK. The final screen will show a confirmation of the import mapping, and assuming everything looks right you can click Done. Your printers will now be imported, and in a few minutes will be queried by IPP to retrieve other information. If you import a lot of data, check the Printers Table to see which fields will be replaced by IPP query.