II. Quick Install & Tour
Installing the Sassafras components is easy. The diagram below is typically all you will need to get up and running using the appropriate installers from a Sassafras archive (download).
Outline of the Installation steps:

| 1. Server | Install the KeyServer process on a single computer |
||
• If you have purchased a Sassafras product, add your license file |
|||
| 2. Client | Install KeyAccess client software – reboot required |
||
• Test client connection to KeyServer |
|||
| 3. Admin | Install KeyConfigure, the Sassafras Platform administrative interface |
||
• Test an Admin connection to KeyServer (default password: "Sassafras") • When KeyConfigure connects to the KeyServer the first time, enable KeyReporter, the web server for dashboard views, lab/building maps, and running reports |
The Sassafras installers and components are completely self contained, and they are compiled for a mix of operating systems running on either 32- or 64-bit hardware. There are no special OS or hardware requirements. For evaluation purposes, all functions can be installed on your desktop or laptop computer.

![]() There were many new features and major interface changes introduced in version 7.x. When upgrading from a previous 7.x version, the changes are not as obvious, but it is still important to read the Major Upgrade from 7.x document.
There were many new features and major interface changes introduced in version 7.x. When upgrading from a previous 7.x version, the changes are not as obvious, but it is still important to read the Major Upgrade from 7.x document.
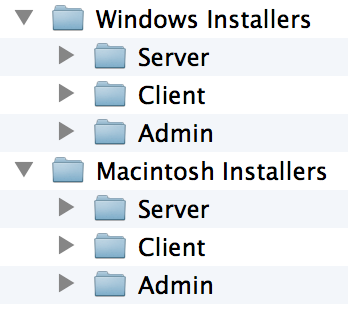
To demonstrate how the Server, Admin, and Client components interact, these installation steps describe a first-time installation of all three functions on a single host computer. Our tour will generally describe Windows file naming conventions and file locations. The file names for Windows installers end with .exe. The corresponding Macintosh installer file names end with .pkg. Differences between Windows versus Macintosh install locations and component file names will be explained by the installer dialogs. Consult the Options & Requirements and OS Details documents for more complete OS specific comments, including support for other operating systems, network requirements, installer customizations, and cautions.
Your desktop or laptop computer can be used to host KeyServer as well as the admin and client components, but make sure that it is configured to never “sleep” during your testing! Also check that no firewall settings will block access to the server process – it receives requests on port 19283 (udp and tcp). If you are installing within a virtual environment (e.g. vmware, parallels, etc.), it will probably be simplest to set up the virtual machine to use "bridged networking" so that the KeyServer service can open port 19283 on its own IP address. You'll also need port 80 for http traffic for KeyReporter, and 443 if you plan to use ssl.
The installers for each Sassafras function (Server, Client, Admin) can be run directly from any mounted volume, local, remote, or virtual – you don't even have to unzip the installer archive since each installer is self contained.
1a. Install the KeyServer process on a single computer.
Logon to a host computer with full administrative privileges. Inside the Sassafras image folder, the Installers folder contains sub-folders for each platform. Open the sub-folder appropriate for your host computer and run the Server installer (e.g. “ksp-server-i386.exe” or “ksp-server-x64.exe” for Windows; “ksp-server.pkg” for Mac).
A dialog at the end of the install will let you start the KeyServer process. It will use the default evaluation license certificate unless a custom certificate is present.
![]() The server process, KeyServer, must be installed on one, and only one, computer host. It will support tens of thousands of connections from the client component installed on Windows, Macintosh, and Linux.
The server process, KeyServer, must be installed on one, and only one, computer host. It will support tens of thousands of connections from the client component installed on Windows, Macintosh, and Linux.
The installer will create a folder named “Sassafras K2” with a sub-folder, "Server", that contains the KeyServer application (ks) and its data folder (KeyServer Data Folder). On Windows, "Sassafras K2" is located in \Program Files or \Program Files (x86) with a shortcut installed in the Start menu. On Mac, “Sassafras K2” is in the Applications directory and the "Server" sub-folder is actually an alias to /Library/KeyServer/.
The KeyServer install process is nearly the same for a Windows or Macintosh host (except for file name and location details), but the process must be modified somewhat for other operating systems. Specific issues when hosting KeyServer on Linux or Solaris are dealt with in the OS Details document. But remember, you only install the server process on one computer. This one install will provide license management services throughout your network and across the Internet to all your client computers (Windows, Macintosh, Linux, Solaris, virtual, and Thin Client).
1b. If you have purchased a Sassafras product, convert from evaluation mode
Without a custom license, KeyServer will use the default evaluation license file named eval.lic, which is created by the installer. If you have received by e-mail a custom server.lic license file, place it into the KeyServer Data Folder (alongside the KeyServer application). Then:

![]() Use the services control panel to stop and restart the KeyServer process.
Use the services control panel to stop and restart the KeyServer process.

![]() Use ks-StartStop (in /Library/KeyServer) to restart the KeyServer process.
Use ks-StartStop (in /Library/KeyServer) to restart the KeyServer process.
![]() You will get an error if you attempt to run the ks process simultaneously as a foreground application (by double clicking the ks executable file) and in background as it is created by the installer (i.e. as a background service or daemon). The ks process should only be started in background using the services control panel (Win) or the ks-StartStop script (Mac) (Admin rights required).
You will get an error if you attempt to run the ks process simultaneously as a foreground application (by double clicking the ks executable file) and in background as it is created by the installer (i.e. as a background service or daemon). The ks process should only be started in background using the services control panel (Win) or the ks-StartStop script (Mac) (Admin rights required).
2a. Install KeyAccess client software – (reboot required)
Run the client installer on one or more client systems and enter the DNS name or IP address of the KeyServer.
Note: the clients must always be able to find the server at the provided address, so be careful if you are using DHCP for the demo that the address does not change. For demo purposes you can install the client on the server itself and use localhost for the address. In production it is unlikely you'll want to use a seat for the server.
![]() In the Sassafras image, from Windows Installers\Client, run ksp-client-i386.exe (on a 32 bit OS) or ksp-client-x64.exe (on a 64 bit OS). Note: even though the 32 bit client can be installed on a 64 bit OS, we recommend deploying the 64 bit client to all computers with 64 bit OS – see Deployment and Win config for more.
In the Sassafras image, from Windows Installers\Client, run ksp-client-i386.exe (on a 32 bit OS) or ksp-client-x64.exe (on a 64 bit OS). Note: even though the 32 bit client can be installed on a 64 bit OS, we recommend deploying the 64 bit client to all computers with 64 bit OS – see Deployment and Win config for more.
![]() In the Sassafras image, from Macintosh Installers/Client, open ksp-client.pkg. See Deployment and Mac config for more.
In the Sassafras image, from Macintosh Installers/Client, open ksp-client.pkg. See Deployment and Mac config for more.
Some demonstrations in the tour are better illustrated if the client software is installed on at least two computers.
2b. Test client connection to KeyServer
After the restart with the client software installed, run the diagnostic utility, KeyVerify:
![]() From the Start menu, open Control Panel and click on KeyAccess. Here you can double check the DNS name or IP address that you entered during the client install and then click the KeyVerify button.
From the Start menu, open Control Panel and click on KeyAccess. Here you can double check the DNS name or IP address that you entered during the client install and then click the KeyVerify button.
![]() From the Apple menu, open System Preferences and click on KeyAccess. Here you can double check the DNS name or IP address that you entered during the client install and then click the KeyVerify button.
From the Apple menu, open System Preferences and click on KeyAccess. Here you can double check the DNS name or IP address that you entered during the client install and then click the KeyVerify button.
Assuming that the KeyServer process is running (with either a custom license or with an unexpired evaluation license), you will see a dialog stating “KeyServer has granted you permission to run KeyVerify”, and the KeyVerify window will show details about your KeyServer connection. If instead you see a message that KeyServer is not responding, check that the address you are using is correct and that the KeyServer process is started. If Windows is hosting KeyServer, open the Services control panel and check the status of the KeyServer service. If Macintosh is hosting KeyServer, use Activity Monitor to look for “ks” running in the root account, or use the ks-StartStop script in the Server folder to see status and start if needed.
3a. Install KeyConfigure, the Sassafras Platform administrative interface
From the appropriate Admin folder in the Sassafras image, run the admin installer (e.g. “ksp-admin-i386.exe” for Windows or “ksp-admin.pkg” for Mac). You can accept all of the installer defaults.
Note that it is not necessary to install KeyConfigure on the same computer that is hosting the KeyServer process, but it is convenient to install it here for this demo tour, and may be useful for troubleshooting in production. At a typical site, KeyConfigure might be installed on various admin workstations, both Macintosh and Windows, for remote administration by the management team.
3b. Test an admin connection to KeyServer
![]() Launch KeyConfigure using the shortcut in the “Sassafras K2” group from the Start menu.
Launch KeyConfigure using the shortcut in the “Sassafras K2” group from the Start menu. ![]() Double-click on KeyConfigure in the /Applications/Sassafras K2/Admin folder.
Double-click on KeyConfigure in the /Applications/Sassafras K2/Admin folder.
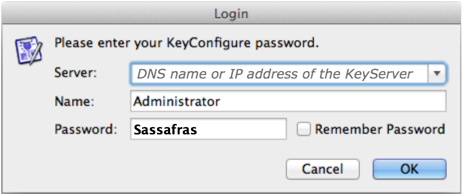
Server needs to be the DNS name or IP of the server. localhost should work if you're running on the same system.
If you leave Name blank, it assumes Administrator so you don't have to type it.
You'll be prompted to change the initial Password, "Sassafras", during your first login.
![]() If KeyServer has failed to start, KeyConfigure won't connect. Its license certificate may have expired – find the eval.lic or server.lic file in the KeyServer Data Folder and open it with a text editing program to check the value of the “license.expires=” line. Also check firewall settings on the host and network devices to make sure that the KeyServer process was able to open port 19283 and that it is able to receive incoming traffic (udp and tcp) addressed to this port.
If KeyServer has failed to start, KeyConfigure won't connect. Its license certificate may have expired – find the eval.lic or server.lic file in the KeyServer Data Folder and open it with a text editing program to check the value of the “license.expires=” line. Also check firewall settings on the host and network devices to make sure that the KeyServer process was able to open port 19283 and that it is able to receive incoming traffic (udp and tcp) addressed to this port.
KeyConfigure's main windows, Computers, Products, Policies, and Purchases, will be displayed in their "standard" position. If you move these windows around you can always return them to the initial layout by selecting "Standard View" from the Window menu. Click on "Custom View" instead to recall your own custom window layout – but first you must arrange a layout and capture it using the same menu item but with the ctrl-key (Win) or option-key (Mac) held down.
4. Enable KeyReporter [Optional].
KeyReporter is a convenient web front end with widget based dashboards to easily visualize your environment, run and schedule reports, build and deploy maps of labs and buildings, and more. While not required for operation, it offers many features not otherwise available in KeyConfigure. When KeyConfigure connects to a new KeyServer installation for the first time, you will be prompted to turn on KeyReporter. The wizard will check availability of the standard web service ports.
![]() KeyReporter opens the web server port 80 by default, 443 if using ssl. If there is already a web server running on this computer, the wizard will notice if ports are unavailable. You may set KeyReporter to use alternate ports or postpone starting the KeyReporter service until you have a chance to relocate the conflicting service.
KeyReporter opens the web server port 80 by default, 443 if using ssl. If there is already a web server running on this computer, the wizard will notice if ports are unavailable. You may set KeyReporter to use alternate ports or postpone starting the KeyReporter service until you have a chance to relocate the conflicting service.
After enabling KeyReporter you will see a link and you can take a look at the UI. But of course most of the widgets will show "no data" at this point. Even at the end of this tour, with one or two client computers and minimal usage, many widgets simply won't be interesting to look at in your data. To get an idea of the power and flexibility KeyReporter will provide in a production environment, take a look at the Dashboard and Map feature pages on our website.
***
Now with the essential components installed, the following steps in this quick tour are designed to explore the basic concepts and features of the Sassafras KeyServer Platform. It is important to follow the tour sequence exactly since each step depends on the context set up by the previous steps.
![]() Before you start exploring features, you should be aware that some of KeyConfigure’s actions cannot be undone. In particular, the optional feature that lets you transform a program into a “keyed” copy is not reversible – only a backup or reinstall will restore the original. Rather than experiment blindly, it is best to carefully follow the steps in this tour and then use the KeyConfigure Help menu, context menu help, and the help search feature for more detailed and specific information.
Before you start exploring features, you should be aware that some of KeyConfigure’s actions cannot be undone. In particular, the optional feature that lets you transform a program into a “keyed” copy is not reversible – only a backup or reinstall will restore the original. Rather than experiment blindly, it is best to carefully follow the steps in this tour and then use the KeyConfigure Help menu, context menu help, and the help search feature for more detailed and specific information.