Full Walkthrough
KeyConfigure
Now that we have gone through how to install, configure, and use the Sassafras KeyServer Platform via the Web UI, we can move on to the stand alone Admin application. We will cover in summary the same basic tasks as before so you can compare and contrast the two interfaces. There be many links out to the normal documentation for the full feature set. Again the focus here will be on practical application and daily operation and not a full detail of every button. The intent of this walk through is to familiarize you with the interface and what is possible, not detail every granular function.
By default when you log in to KeyConfigure you will see what we might call the "big 4" windows. These form the core of the daily functionality of the software and tie together at the Product level in many ways. If you make a mess of the UI, you can restore the default by choosing Window -> Standard View from the menu bar.
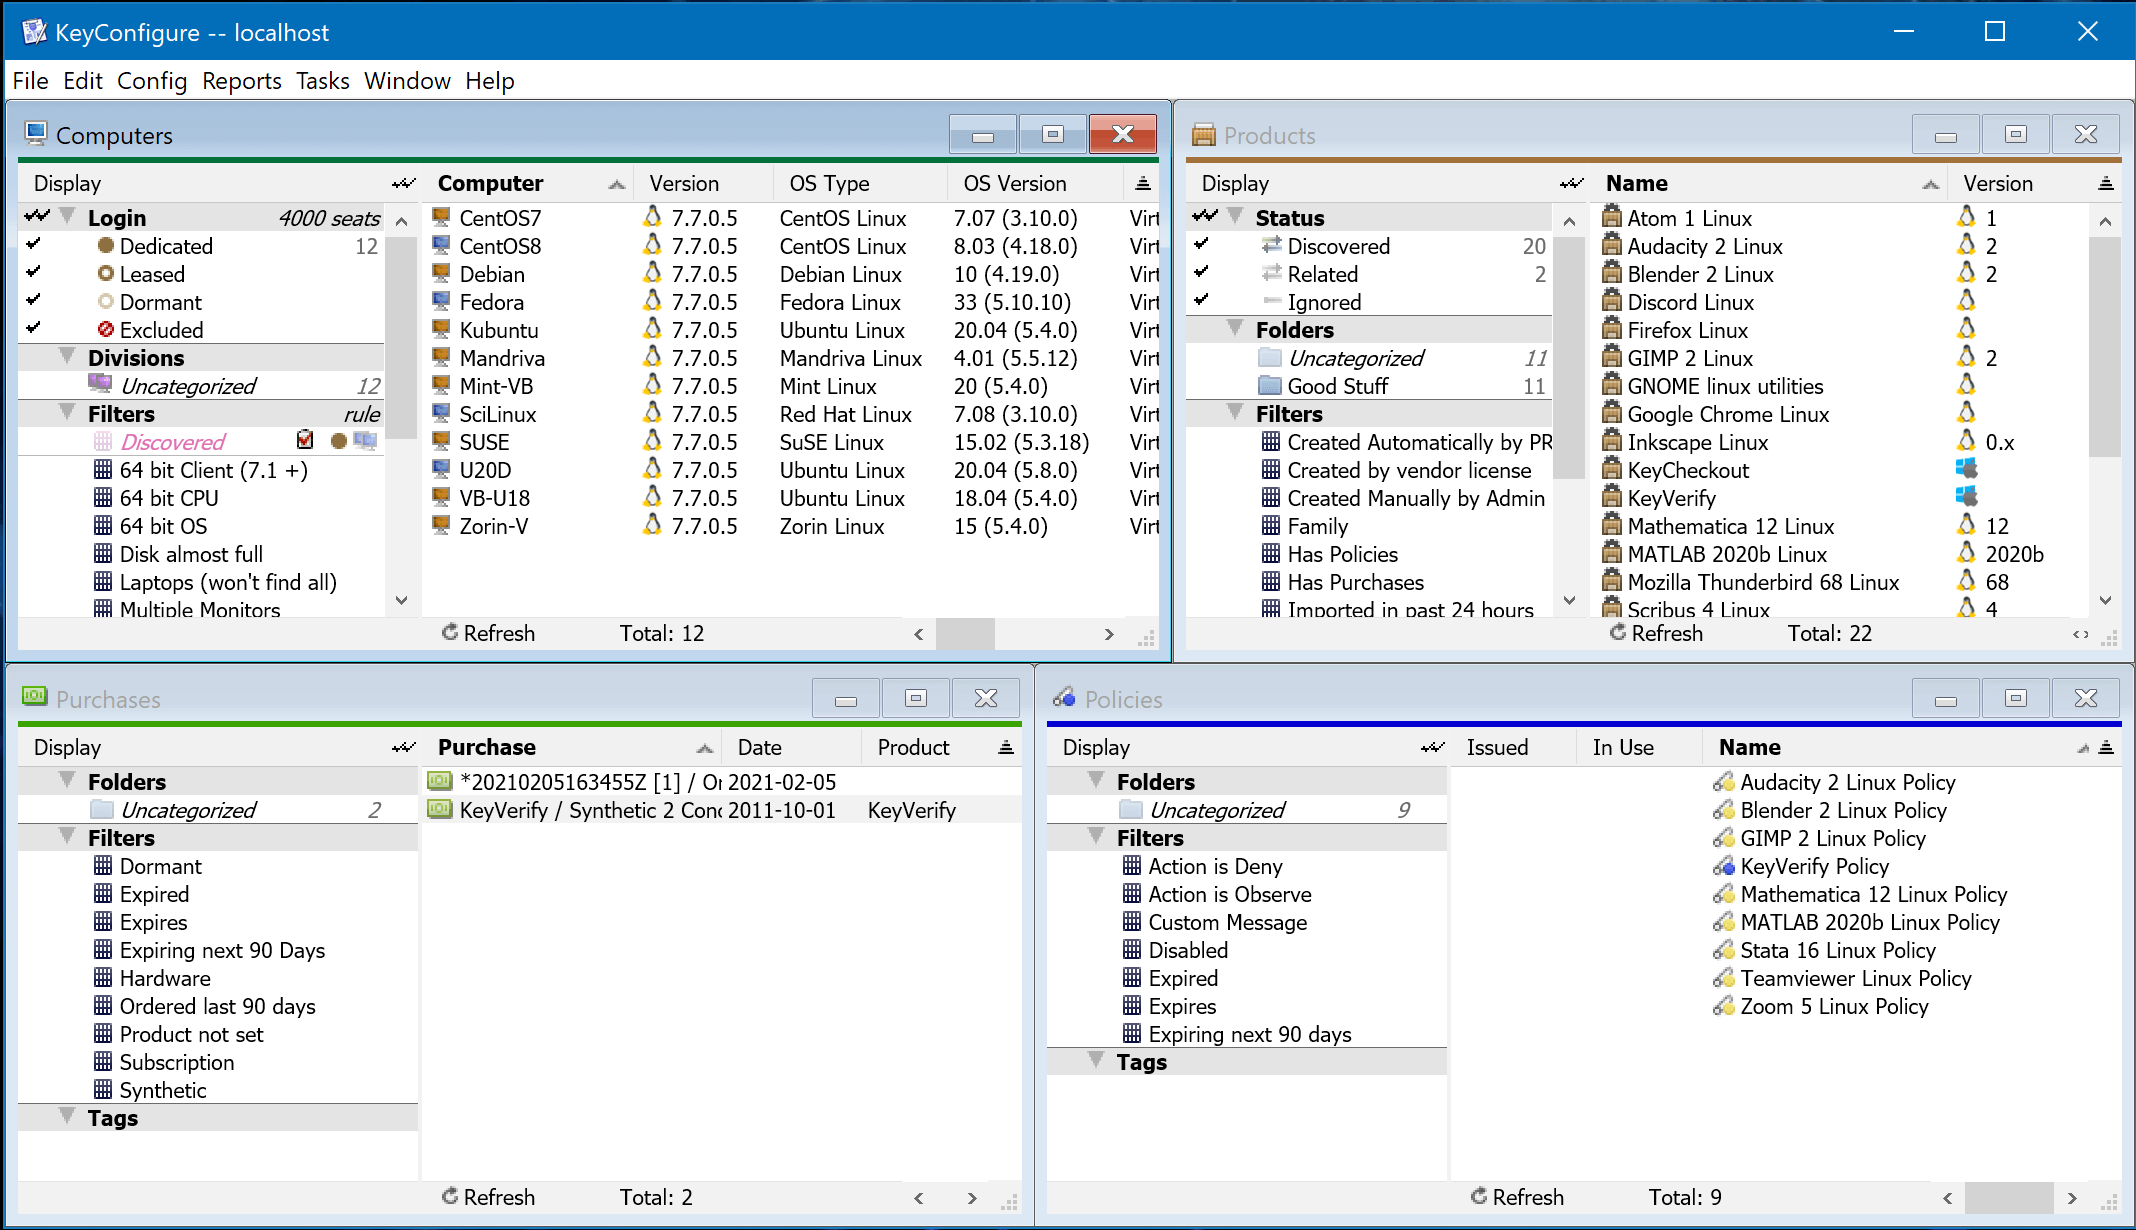

A few items of Note:
More items will be detailed as we move through the application, but this gives a good overview of some differences. Full admins and power users will likely use both tools, but most daily users will never use KeyConfigure.
Every window has the same basic layout. A left side navigation pane for managing and organizing the objects, and a right side main pane for showing the objects. There are some other common items through the UI:
Computers
Compare this window to the Computers screen in the Web UI. KeyConfigure allows you to perform advanced configuration of ACLs on Divisions and create Sections for full federated management if needed. Unlike the other 3 main windows, you can not right click and make a new Computer. Computer records are normally only created when a client talks to the server. However, you can drag in a CSV file to import pre stage records if you like. Special considerations are needed to ensure the real computer attaches to the prestage record based on the ID, so we recommend working with support initially on this process. The Web allows the ad hoc creation of a single computer record.
The Login pane of this window is significant to your license position of the Sassafras Server itself. For AllSight and LabSight any Dedicated or Leased computer is using a license seat. You can see your total seats at the top. You can also click the Total in the footer of the window to see a popup summary of your license position. Dormant and Excluded computers do not use a license seat, and are not included in your Audit reports. They will however be included in your Usage reports. Typically, computers should be moved to Dormant when they are retired from use. Because Dormant systems automatically move to Leased on connection, if any computer appears in Leased it's a sign something came back into service that was not expected to be online. This lets you investigate that machine as to why this occurred. A Leased system that is offline for a period of time (varies by criteria) will automatically move to Dormant. There are special cases with Thin Client virtualization technologies that should leverage Leased as the default state instead of Dedicated.
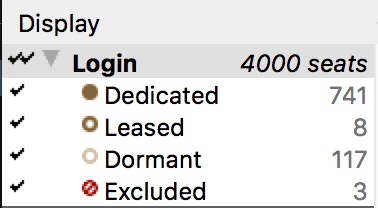
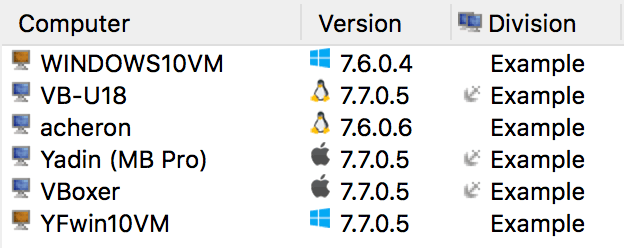
As mentioned in the previous section, allocation of Computers into Divisions can be automated with Active Directory to mirror your OU structure. You can also manually create Divisions and drag computers where you need them. If you move a computer, it becomes Anchored and will not move automatically. This is shown with an anchor icon in the Division column of the main pane.
Bulk operations are possible by way of Admin Scripts, though these are not as flexible as Quick Edit in the Web. Under File - Manage Scripts you can view a library of these optional scripts at Sassafras. Simply drag a script to the Server section at the top of this window to add it to your instance. You can then access the script by Right Click where applicable.
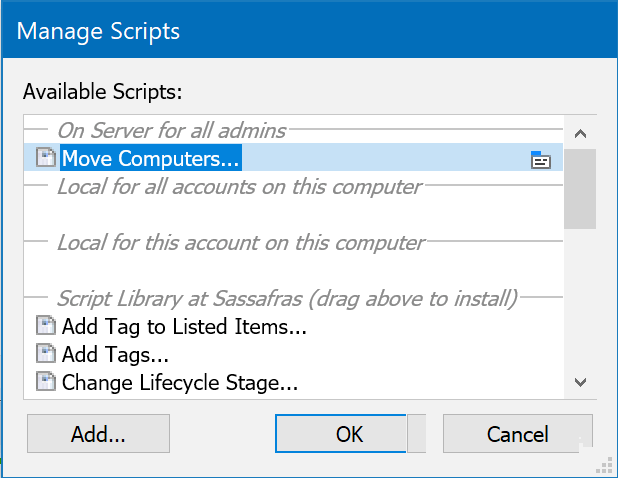
Some scripts for Computers include:
Computer Details
If you double click on a computer you can view its Details window. Note all detail windows (Products, Purchases, Policies, etc) have a row of icons in the upper right. Under these icons is a little dot if the pane that icon represents is currently displayed. It is often beneficial to turn them all on to see all possible details. Each pane can also be collapsed by its header bar. You can customize the various options and optional data fields in this details window.
![]()
Note the Computer Details is special compared to all other object details in that there are 10 Custom fields that can be defined. Once you add labels for these fields they appear in the details pane of KeyConfigure and the Web UI and you can populate their values. These can be automatically populated by registry/plist values on the client machines if you have methods of populating those areas on a client. That is, scripting can be used in an environment to write data on client machines that is then automatically pulled up to the records on the server. This includes the 10 custom fields and the fields in the Asset pane.
Products
The Products window is the analogue to the Software - Manage page of the Web UI. However, it does not have an easy interface for creating Observe Policies like the Web screen. Conversely, when you first open KeyConfigure, anything that would be in the Attention section of the Web UI would appear in a popup for the Automatic Policy Wizard.
The most useful parts of the Products window are seeing what software you have in what quantity, and ensuring it is monitored if needed. Products are automatically pulled from our PRS catalog based on the Programs we find on your Computers during Audits. If we don't have a Product, you can make one manually if needed. Products represent suites, such that Microsoft Word is a Program that would be in a Microsoft Office Product. That Product will have Editions say for 2009, 2013, 2020 which will all be in the MS Office Family product. By observing the family (which is what the wizard formerly mentioned does) you get usage tracking of every version of every program underneath.

Looking down the list of products you can see at a glance how many Installs you have of a given product. Note that Edition installs are not aggregated into their Family, so family products will never have an install count. You can also see by the Status column if the product is in a Policy and/or referenced by a Purchase. Using these bits of information you can quickly see if you have usage and financial data in place for titles installed on your computers and address any gaps.
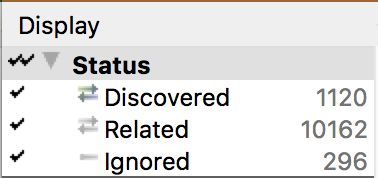
The Status pane in the upper left of this window indicates how many Products are actually Discovered, vs the Related items. You may not have Office 2007, but it is a child of the family you do have a version of, so it comes along for the ride. By unchecking the Related Status, you remove from view all the items you don't actually have. Ignored items are completely ignored. This is not the same as telling the wizard to ignore a discovered family, which simply does not create an Observe Policy and doesn't ask you again. Ignored Status actually removes the Product from all Audit reports as well. This can be useful in some cases.
For example, say you have Adobe Creative Cloud. But on one set of video editing computers you only install Premiere. Because we discover only the one Program, we guess that these are stand alone Premiere Product, NOT the Creative Cloud Product, because there are no other programs from the suite on the computers. By your license, these installs are not being correctly counted in KeyServer. So, you drag the Premiere Product to Ignored, thereby forcing the system to find another product containing the program to count that install. Repeat as needed to force all installs to show under the product you actually have licenses, regardless of what discovery indicates.
We have some Products that are Ignored by Default. You may want to review the members of this Status and move any you are interested in to Related (drag and drop). Any Related items that are then found to have installs are moved to Discovered.
We mentioned Admin Scripts in the Computers section above. There is a script called Computers Without Product that is useful in this window as it does the opposite of an Audit report. Instead of finding where something is, you find where it isn't.
Note that there is also an ability to track Website use by creating a Web Product. If you have a web based service that you wish to track use of (especially because it is a paid service), simply determine the URL that is hit once authenticated to that service and therefore representing "using a license". Once that URL is created as a web product, you can track use in a Policy just like normal software. Any supported browser Supported Browsers
Windows: Firefox, Chrome, Edge
Mac: Firefox, Chrome, Safari
Linux: Firefox, Chrome accessing that URL will report usage in the policy. While you could use this to do things like track who is playing on Facebook for how long, that may also generate a lot of usage data, so as with normal software be careful about what you are tracking for the sake of efficiency. Note also that you can not Deny a web product (a deny notice will show, but not close the page), but you can Manage it and therefore pop up a warning message when it is accessed.

Policies
While the KeyAccess agent collects a lot of detailed inventory of both hardware and software in the Audits, this does not give an indication of Usage. The only detail in a Program or Product Audit would be the Last Used date. So, at the very least you know if a given software was used and when. But you don't know by who or for how long. This is where Policies come in.

At the simplest level is the Observe policy which as a yellow dot icon. This is what is created by the automatic policy wizard or the Manage software capabilities previously discussed. This level of policy tells the client to record when the launch and quit events occurred, which then allows you to report on who used what where and for how long.
The more advanced type is the Manage policy, which has a blue dot icon. There are many many settings when using a Manage policy.
The last type of policy you can create is a Deny which has a red dot. This simply stops the program from being run, be it because of lapsed entitlement or simply not allowing an unauthorized program like torrent software.
In certain instances a Vendor partner using our API will supply a license file for their software that you put into the server data folder. This will appear with a green dot and only certain aspects can be edited. Metric and limit will be locked by the vendor, but you can still leverage groups and pools for controlling the allocations.
Considerations
Be mindful when making polices that you don't track usage that is unlikely to be meaningful in reports. Examples include security software that runs automated scans and utilities that launch at user login. Because the use of these items is either programatic and not user initiated, or is simply 100% because they are always running, logging them would not be useful. Audit information will allow you to see what versions are installed where and confirm they are being launched. The granular usage data however would simply take database space which slows down reporting in general for data that will never be called upon for decision making.
Another area of consideration is freeware. If tracking usage will not inform financial decision making and savings, is it useful to track? Perhaps you want to know if something that takes deployment time and effort is worth while. Again, does the last used information from an Audit satisfy this need, or do you want to see the full usage information? Web browsers can generate a lot of logging, so unless there is an operational need to know usage details we don't recommend tracking these.
One should also be careful when crafting a policy that it works as desired. Double check settings before putting it into action. If you accidentally deny an application for the entire organization when you meant to scope it to only one division, that could make some phones ring.
Purchases
The last of the "big 4" windows is Purchases. Note this is only available in the AllSight tier of our product. Use of this module is not required in any way, but it can streamline financial reporting and Compliance analysis. By inputing basic purchase information and linking to Products, you can use our Reports and Dashboard Widgets to see your license position and well as Return on Investment. This is because we can easily compute if you bought 100 seats at $100 each and your peak use for the year was 60 seats, you could save $4,000 on the next renewal by not oversubscribing again.
Purchase Details have a lot of optional information. The module can be used for a complete purchase database if desired as it includes these items among many others:
As with the Computers window you can bulk Import purchase records by CSV file from another source. The flexible import system allows mapping source columns to destination fields, and saving that mapping for later repeat import. Once imported additional modifications can be made, like linking the records to Products for license tracking or Computers for lifecycle information.